
instructions for crystal growing kit
Crystal growing kits offer an engaging way to explore science and creativity, providing hands-on learning about geology and chemistry through the fascinating process of crystal formation.
Overview of Crystal Growing Kits and Their Educational Value
Crystal growing kits provide an interactive learning experience, combining chemistry and geology. They teach concepts like solubility, saturation, and crystal structures through hands-on activities. These kits are ideal for students and hobbyists, fostering curiosity and scientific observation. They cater to various age groups and skill levels, making complex scientific principles accessible. By following step-by-step instructions, users gain practical knowledge while enjoying the creative process of crystal formation, aligning with STEM education goals.
Importance of Following Instructions for Successful Crystal Growth
Importance of Following Instructions for Successful Crystal Growth
Following instructions precisely is crucial for successful crystal growth. Proper saturation, temperature control, and avoiding contamination ensure optimal conditions. Deviations can lead to slow growth or malformed crystals. Instructions guide the preparation of supersaturated solutions and seed placement, minimizing disturbances. Adhering to steps ensures a stable environment, promoting uniform crystal formation. Patience and attention to detail are key, as rushed or incorrect methods often result in disappointing outcomes. Accurate preparation guarantees the best results.

Safety Precautions and Preparation
Handle chemicals carefully, avoiding skin contact, and keep them out of reach of children. Use protective gear and ensure a stable setup away from disturbances for safe crystal growth.
Essential Safety Measures for Handling Chemicals and Hot Water
Always wear protective gear, including gloves and goggles, when handling chemicals. Keep them away from skin and eyes to prevent irritation. Use boiling water cautiously to avoid burns. Ensure the workspace is clear of clutter and out of children’s reach. Properly ventilate the area and follow instructions for chemical disposal. Adult supervision is crucial, especially when involving minors. Prioritize safety to enjoy a hazard-free crystal-growing experience.
Setting Up a Safe and Stable Environment for Crystal Growth
Ensure the growth area is flat, stable, and undisturbed to prevent vibrations or spills. Place the container on a heat-resistant surface, away from drafts and direct sunlight. Maintain a consistent temperature, ideally warm, to promote steady growth. Keep the area clean and free from dust or contaminants. Avoid moving the setup once the crystal seed is placed, as this can disrupt the growth process and lead to irregular formations.

Preparing the Solution
Dissolve the crystal-growing chemical in boiling water, stirring until fully dissolved. Allow the solution to cool slightly before pouring it into the growth chamber.
Step-by-Step Guide to Dissolving Crystal Growing Chemicals in Hot Water
Start by measuring 200ml of boiling water. Gradually add the crystal-growing powder, stirring continuously until fully dissolved. Ensure no lumps remain. Allow the solution to cool slightly before transferring it to the growth chamber. This step is crucial for creating the ideal conditions for crystal formation. Always handle chemicals with care and keep them out of reach of children.
Understanding the Role of Boiling Water in Crystal Growth
Boiling water is essential for dissolving crystal-growing chemicals, as it increases solubility and creates a supersaturated solution. This process allows more particles to dissolve than under normal conditions, which is crucial for crystal formation. The hot water ensures the chemical powder dissolves completely, forming a clear solution. Once cooled, this solution provides the ideal environment for crystals to grow, making boiling water a critical step in the crystal-growing process.
Choosing and Preparing the Seed Crystal
Select a base rock or seed crystal, ensuring it is clean and dry. Proper preparation ensures optimal crystal growth by providing a stable surface for formation.
Selecting the Right Base Rock or Seed for Crystal Formation
Selecting the right base rock or seed is crucial for successful crystal growth. Choose a clean, dry seed crystal or base rock from the kit. Ensure it is free from impurities and has a stable surface for crystal formation. Proper preparation involves washing the seed in warm water and drying it thoroughly. This step ensures the seed provides a clean surface for crystals to form, promoting healthy and consistent growth over time.
Cleaning and Drying the Seed Crystal for Optimal Growth
Cleaning and Dying the Seed Crystal for Optimal Growth
Cleaning and drying the seed crystal is essential for optimal growth. Wash the seed in warm water to remove impurities, then gently pat it dry with a lint-free cloth or paper towel. Ensure no residue remains, as this can hinder crystal formation. A clean, dry seed provides a smooth surface for crystals to adhere and grow evenly. Proper preparation ensures the best conditions for successful crystal development.

Setting Up the Growth Chamber
Setting up the growth chamber involves carefully placing the seed crystal and pouring the prepared solution. Seal the container and keep it undisturbed for optimal results.
Assembling the Growing Vessel and Placing the Seed Crystal
Start by preparing the growing vessel, ensuring it is clean and dry. Place the seed crystal at the bottom of the container, securing it if necessary. Carefully pour the prepared solution over the seed, making sure not to disturb it. Cover the container with a lid or plastic wrap to prevent contamination. Position the setup in a warm, stable environment, avoiding any movement to allow crystals to form undisturbed over several days.
Adding the Prepared Solution to the Growth Chamber
Gently pour the prepared solution into the growth chamber, ensuring not to disturb the seed crystal. Avoid splashing or agitating the liquid, as this can disrupt crystal formation. Cover the container securely to prevent contamination and maintain a consistent environment. Place the setup in a warm, stable location, away from drafts or vibrations. Allow the solution to cool and sit undisturbed, enabling the crystal to grow steadily over time without interference.

Creating a Supersaturated Solution
Dissolve the crystal-growing chemicals in boiling water to create a saturated solution. Allow it to cool slightly, forming a supersaturated solution ideal for crystal growth.
Understanding the Science Behind Supersaturation
Supersaturation occurs when a solution holds more dissolved material than it normally can at a given temperature. By dissolving crystal-growing chemicals in boiling water, the solution becomes saturated. As it cools, the solubility decreases, creating a supersaturated state. This unstable condition drives the formation of crystals, as the excess material seeks a stable structure. A seed crystal provides a site for crystallization to begin, allowing the solution to return to equilibrium through controlled growth.
Ensuring Proper Saturation for Crystal Development
Achieving proper saturation is crucial for crystal growth. Dissolve the crystal-growing chemicals thoroughly in boiling water to maximize solubility. Stir continuously to ensure all powder dissolves, forming a saturated solution. Allow the mixture to cool slowly to maintain saturation levels. Avoid rapid cooling, as it can disrupt the balance. Once cooled, gently place the seed crystal into the solution, ensuring it’s undisturbed. Monitor for evaporation and cover if necessary to preserve saturation and promote steady crystal formation.
Monitoring Crystal Growth
Place the seed crystal in the solution, wait for growth to begin, and observe changes daily. Document the process to track progress and ensure undisturbed conditions for optimal crystal development.
Observing and Recording Crystal Formation Over Time
Monitor the crystal growth daily, noting changes in size, shape, and color. Record observations in a journal, including sketches or photos. Be patient, as growth may take days or weeks. Ensure the environment remains stable and undisturbed to promote consistent development. Address any issues like slow growth by adjusting conditions or consulting instructions. Regular documentation helps track progress and identify patterns, enhancing the learning experience and fostering scientific curiosity.
Maintaining a Stable Environment for Consistent Growth
To ensure consistent crystal growth, place the container in a stable, undisturbed location. Avoid direct sunlight and vibrations, as these can disrupt crystal formation. Keep the container covered to prevent dust and evaporation. Maintain a consistent room temperature, ideally between 65-75°F (18-24°C), to promote steady growth. Regularly check the setup and avoid moving the container unnecessarily. This stable environment fosters optimal crystal development and minimizes disruptions, leading to better results.
Troubleshooting Common Issues
If crystals dissolve or grow unevenly, check for temperature fluctuations or impurities. Ensure the solution is properly saturated and avoid disturbing the container during growth.
Addressing Slow Growth or Absence of Crystals
If crystals aren’t forming or growing slowly, ensure the solution is properly saturated. Check for insufficient dissolution of chemicals or incorrect water temperature. Avoid contamination by dust or impurities, and maintain a stable environment. Ensure the seed crystal is clean and undisturbed. If issues persist, restart with a fresh solution, following instructions carefully. Patience is key, as crystal growth can take days to weeks depending on conditions.
Preventing Irregular Crystal Formations and Disturbances
To avoid irregular crystal growth, ensure the solution is properly saturated and avoid disturbing the container. Keep the environment stable and vibration-free. Clean the seed crystal thoroughly before use, and ensure no impurities are present. Avoid moving the growth chamber once the process begins, as this can disrupt crystal formation. Minimize contamination by covering the container when not observing. Consistent conditions and patience are key to achieving uniform and well-formed crystals.
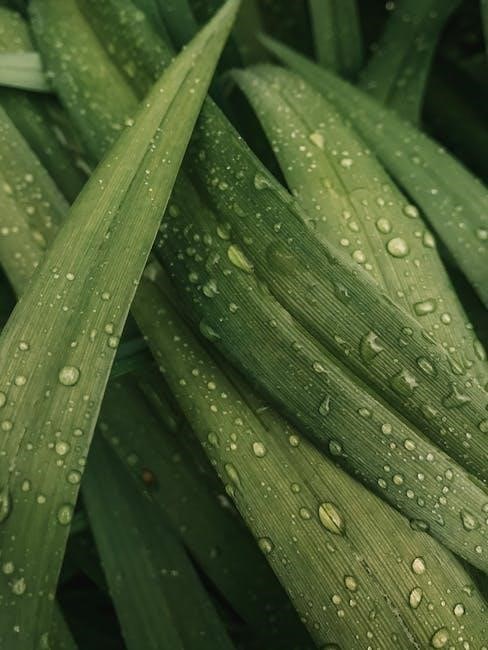
Displaying Your Crystals
Showcase your grown crystals in a clean, dry glass container or display box. Preserve them by avoiding direct sunlight and moisture to maintain their vibrant colors and shapes.
Methods for Showcasing Your Grown Crystals
Once your crystals are fully grown, display them proudly in a glass container or clear plastic case to highlight their vibrant colors and intricate shapes. For a creative touch, use glue to attach crystals to a decorative base or string them into hanging ornaments. Store them in a dry, cool place to preserve their beauty. Consider arranging multiple crystals together to create stunning visual displays or even integrate them into handmade jewelry for a personalized touch.
Storing Crystals for Long-Term Preservation
To preserve your crystals, store them in a cool, dry place away from direct sunlight, which can cause fading. Use an airtight container or plastic case to protect them from moisture and dust. Handle crystals gently, as they are fragile and may break easily. For extended preservation, avoid exposing them to extreme temperatures or humidity. This will ensure your crystals remain vibrant and intact for years to come.

Advanced Techniques and Variations
Experiment with various chemicals, colors, and shapes to create unique crystal formations, enhancing your scientific understanding and creative expression through hands-on exploration.
Experimenting with Different Chemicals and Colors
Explore various chemicals like potassium ferricyanide or cupric sulfate to grow unique crystals. Add food coloring to create vibrant hues, enhancing the visual appeal of your crystals. Mixing different compounds can alter growth rates and shapes, offering insights into chemical interactions. Always follow safety guidelines and instructions when handling new substances. Supervision is recommended, especially for children, to ensure safe experimentation and optimal results.
Creating Unique Crystal Shapes and Designs
Generate distinctive crystal shapes by using molds or unique seed structures. Experiment with varying temperatures and solution concentrations to influence growth patterns. Add colorants or dyes to create visually striking crystals. For intricate designs, suspend multiple seeds or introduce obstacles in the growth chamber. This allows crystals to form in unusual formations, blending art and science. Regular observation and precise control over conditions can yield truly one-of-a-kind crystal creations.
Crystal growing kits provide a fun, educational experience, teaching hands-on science. For enthusiasts, explore recommended kits and resources for further crystal growth exploration and learning.
Summarizing the Crystal Growing Process
Crystal growing involves preparing a supersaturated solution, selecting a seed crystal, and creating a stable environment for growth. Dissolve chemicals in boiling water, add the seed, and allow the solution to cool and crystallize. Monitor the process, maintaining a stable environment to ensure proper crystal formation. This hands-on activity teaches principles of supersaturation and crystal development, offering a fascinating blend of science and creativity for enthusiasts of all ages.
Recommended Kits and Further Reading for Enthusiasts
Top-rated crystal growing kits include the National Geographic Crystal Growing Kit and the 4M Crystal Growing Experimental Kit, praised for their educational value and clear instructions. For further learning, explore resources like “Crystal Growth” by the American Crystallographic Association or “The Art of Crystal Growing” by Radha Narayan; These kits and books provide a comprehensive understanding of crystal science and practical experimentation for enthusiasts of all skill levels.
Related Posts

cartisan vape pen instructions
New to your Cartisan vape pen? We’ve got you covered! Simple instructions, helpful tips, and common fixes – get the most out of your vape experience now. **Cartisan vape pen** made easy!

brother sewing machine ls 2125 instruction manual
Lost your manual? Find the official Brother LS2125 instruction manual here! Easy-to-follow guides, troubleshooting tips & more to get your sewing machine running smoothly. **Brother LS2125**!

instruction tuning vs fine tuning
Discover the key differences between instruction tuning and fine tuning. Learn how to optimize your models effectively with expert tips from Brothers on Tech.